A big part of owning an aquarium is completing partial water changes to maintain the tank’s cleanliness. These partial water changes will also alert you to any illnesses or malfunctions with the tank.
You can leave your fish in the tank during a partial water change. This is because you are not removing all of the water. However, if there is a disease outbreak or multiple fish dying in your aquarium, you will want to remove the fish from the tank and do a complete water change.
Of course, when leaving your fish in the tank, always make sure they don’t get stuck in any tubing while removing water if they are small enough to fit!
Read on to learn more about the process of completing partial and complete water changes!
How to Complete a Partial Water Change
Partial water changes are part of the maintenance of having an aquarium. Contrary to belief tank size does not contribute to how easy or difficult the maintenance on a tank is.
The tank size will only affect the amount of water that needs to be taken and replaced as weekly you will be replacing 10-20% of the water.
Performing regular partial water changes will keep the tank clean as you are removing waste and chemicals and reintroducing beneficial bacteria and minerals back into the tank.
Doing so will help maintain the water parameters your fish need to live comfortably and healthily.

With a partial water change, it is fine to leave the fish inside the tank as you will only be taking out some of the water.
Leaving them inside the tank can also reduce stress from being moved into different environments until back in their tank.
Steps for a partial water change:
- Ensure you have the proper equipment and tools necessary for the water change. You will need a siphon or gravel vacuum. As well as buckets to catch the water and dump it out. Also, you will need beneficial bacteria to add back in, from a condition to treat the water with prior to adding to the tank.
Also, it is recommended you let the conditioned water sit for up to 24 hours prior to performing the water change. Allowing the tap water to sit will allow the pH levels of the tap water to lower to the parameters that you need as it becomes oxygenated.
- After ensuring you have everything you need to do your partial water change you will want to start by preparing your tank. To prepare your tank you will unplug the equipment on your tank, such as the filter system. This should be kept unplugged during the entire process.
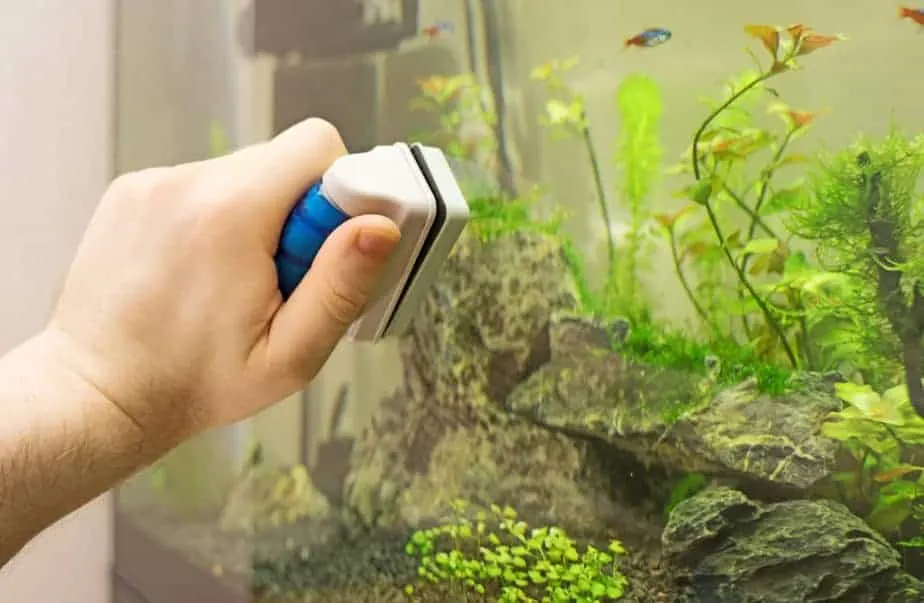
- Start cleaning up your tank by scraping the glass and tank to remove the algae. You will also want to remove any dead leaves of plants from the tank as well.
- Siphon the amount of water needed into buckets using a siphon or gravel vacuum. Make sure to keep the vacuum as close to the substrate to remove as much waste as you can. Be careful not to suck up small fish or bottom dwellers while doing this.
- Remove decorations if they are covered in algae and clean them. This can also be a good time to clean your filter system if it needs it.
Before you add the new water to the tank, it is best to test the water to make sure the parameters are correct. After that, you can safely add that water into the tank.
- After the new water has been added, you can plug your tank equipment back in. Make sure everything is working properly after being plugged back in. Replace the lid on the tank and you are done!
How to Complete a Complete Water Change
Unlike partial water changes that should be regular as part of the aquarium maintenance, a total water change should be done only if needed.
For a complete water change, you will need to remove any fish as well as nonfish species from the tank. A complete water change should only be done if it is absolutely necessary. In cases of
Steps for a complete water change:
- The first step for a complete water change is to remove the fish from the aquarium and place them in a bucket in a safe environment.
- After removing the fish you will follow the same steps as a partial water change, except removing all the water from the tank. While removing all of the water you will be able to better clean all of the waste that is sitting in the substrate. While you are waiting for the water to drain you can start removing everything from the tank, such as decorations and equipment.
Once the water is drained the substrate is cleaned of waste you can remove it to clean it even more if needed.
You will need to clean your filter system, replace the filter as well, and clean the decorations and other equipment.
If you are using bleach or other chemicals to clean your decorations and equipment make sure to repeatedly rinse them after to remove any chemicals.
- Once everything has been removed and the tank itself has been cleaned, you can start adding pretreated water back into the tank. You can add the fish back into the tank after enough water has been put in as you finish filling the tank, or you can add them after all the water has been added back in.
- After the tank is filled back up, you can plug your equipment back in and ensure everything is working properly. After a complete water change, you may notice signs of stress in your fish.
Signs of Your Tank Needing a Complete Water Change
As previously stated, a complete water change should only be done when absolutely necessary as it can cause stress on your fish.
On top of this, a complete water change should only be done after exhausting all options.
Below are a few reasons why you may need to do a complete water change:
- Widespread disease amongst fish. This goes without saying that if you do have a disease in your tank, a complete water change may be necessary to combat the disease and keep the other fish safe. Again, this should only be done if multiple fish are diseased. If you notice one, remove it from the tank and place it in a solitary tank.
- Unsolvable algae bloom. Algae can be controlled in most cases, but if you are struggling with removing algae and have tried water treatments, partial water changes, and removing light- then doing a complete water change may be your best option.